If your home was built before 2010, there's a good chance it still has halogen downlights. They were the standard choice for a solid decade — bright, cheap to install, and they looked fine. The problem is what's happening inside your ceiling that you can't see. This guide covers everything you need to know about making the switch to LED downlights properly, not just the way that looks fine but creates a hidden fire risk.
The Problem With Halogen Downlights
Halogen downlights are power-hungry and dangerously hot. A standard 50W halogen globe operates with a surface temperature of around 300°C. That's not an exaggeration — that's hot enough to ignite timber and insulation on contact.
The fire risk is most serious when insulation is present in the ceiling. Queensland homes built or renovated in the last couple of decades typically have bulk insulation batts laid across the ceiling space. When those batts rest against or near a halogen downlight, you've got a serious ember waiting to happen. Industry estimates have linked halogen downlights to hundreds of house fires across Australia.
Beyond the fire risk, the energy waste is significant. A typical home with 20 halogen downlights is burning through 1,000 watts every time you turn the lights on. Compare that to the LED equivalent and you could cut your lighting energy use by 80% or more.
Why "Just Swap the Globe" Is Not a Fix
This is the one that catches a lot of homeowners off-guard. You've probably heard that you can just pull out the halogen globe and pop in an LED retrofit globe. Same base, easy swap. Job done — right?
Not quite. Here's what most people don't realise: the problem isn't just the globe, it's the fitting itself.
The old halogen fitting has open holes around it. Those gaps let hot air, embers, and vermin move freely between your living space and the ceiling cavity. An LED retrofit globe runs cooler, yes — but the unsafe fitting remains.
Halogen fittings were never IC-rated — they were specifically designed with ventilation gaps because they produced so much heat they needed airflow. That means insulation around them is still a problem. The batt touching the fitting is still a combustion risk, even with an LED globe installed.
A proper upgrade means removing the old fitting entirely and installing a purpose-built, fire-rated IC-rated LED downlight in its place. That's the only fix that actually addresses the safety issue.
What IC-Rated and Fire-Rated Actually Mean
IC Rating — Insulation Contact
An IC-rated downlight is specifically designed and tested to be in direct contact with ceiling insulation without creating a fire hazard. The fitting is thermally sealed so that even if insulation is piled directly on top of it, heat cannot build to dangerous levels. In any home with insulation — which is most Queensland homes — IC-rated fittings are not optional, they're a building code requirement.
Fire Rating — Ember Barrier
A fire-rated downlight (sometimes called a fire collar downlight) contains an intumescent material inside the fitting. In the event of a fire in the ceiling cavity, this material expands when it gets hot and seals the opening — preventing flames, embers, and smoke from travelling through the downlight hole into the room below. This buys critical minutes for evacuation.
The sealed design also has a useful secondary benefit: it stops insects, rodents, and air-conditioned air from escaping into your ceiling — which actually adds to the energy efficiency of the home.
IC vs Non-IC — Which Do You Need?
| Situation | What You Need |
|---|---|
| Ceiling has insulation (batts or blown-in) | IC-rated fitting — mandatory |
| No insulation in ceiling cavity | Non-IC rated acceptable, but IC is still a smart choice |
| Replying to a home built after 2005 in QLD | Almost certainly IC-rated required — assume insulation is present |
| Any residential property regardless of insulation | Fire-rated fitting strongly recommended for life safety |
In practice, for any home on the Sunshine Coast, we install IC-rated fire-rated LED downlights as the standard. There's no downside to them and the protection they provide is genuine.
Colour Temperature — Choosing the Right Light
One of the most common questions we get is about the colour of the light. LED downlights come in several colour temperatures, measured in Kelvin (K). Get this wrong and the room will feel off — either sickly yellow or like a dentist's waiting room.
| Colour Temp | Appearance | Best For |
|---|---|---|
| 2700K | Warm white — slightly golden, soft and relaxed | Bedrooms, living rooms, dining areas. Creates an inviting, comfortable atmosphere. Closest to the old halogen look. |
| 3000K | Neutral white — clean and crisp without being harsh | Kitchens, bathrooms, home offices. Bright enough for tasks without feeling clinical. |
| 4000K | Cool white — bluish-white, sharp and clear | Garages, workshops, laundries, commercial spaces. Maximum visibility for detailed work. |
Quick rule of thumb: If you want your lounge room to feel warm and relaxed like it did with halogens, choose 2700K. If you want your kitchen to feel bright and clean, go 3000K. Most of our jobs end up with 2700K in bedrooms and living areas, 3000K in kitchens and bathrooms.
Dimmer Compatibility — A Common Trap
Many homeowners have dimmer switches installed and naturally want their new LED downlights to work with them. The frustrating reality is that not all LEDs are dimmable, and even dimmable LEDs won't work properly with every dimmer switch.
Most older dimmer switches are TRIAC leading-edge dimmers, designed specifically for the resistive load of halogen and incandescent globes. LEDs have a fundamentally different electrical characteristic (capacitive load), which means an old leading-edge dimmer will often cause LED lights to flicker, buzz, drop out at low levels, or simply not dim at all.
The solution is either:
- Specify dimmable LED fittings and replace the dimmer switch with a trailing-edge (leading-edge compatible) LED dimmer, or
- Source LED fittings that are specifically listed as compatible with your existing dimmer brand and model.
Your electrician should check this before specifying fittings. We always ask about dimmers upfront and test the combination before we leave a job.
The Energy Savings — Real Numbers
One of the most satisfying parts of this job is showing homeowners the maths. The savings from halogen-to-LED are significant and the payback period is genuinely short.
Per Fitting, Per Year — The Maths
per fitting
per fitting
(80% reduction)
per year*
* Based on 8 hours use per day, 250 days per year at $0.35/kWh. A home with 20 downlights saves approximately $200/year in lighting electricity alone — not counting reduced A/C load from less waste heat. Most jobs pay back within 2–3 years.
There's also a maintenance saving. Halogen globes blow every 1,000–2,000 hours. A quality LED fitting is rated for 25,000–50,000 hours. You're essentially done replacing globes for the life of the fitting.
What's Involved in the Installation
A full halogen-to-LED downlight replacement is a straightforward job for a licensed electrician, typically taking 20–40 minutes per fitting depending on ceiling access. Here's what the process looks like:
- Isolate the circuit. Power is switched off at the switchboard for the affected lighting circuit and verified dead with a test instrument. Not negotiable.
- Remove the old halogen fitting. Spring clips are released and the fitting pulled down, then the wiring connector is disconnected.
- Inspect the ceiling cavity. We check what's up there — insulation type, wiring condition, any signs of previous heat damage near the old fittings. On older homes, this sometimes turns up wiring that needs attention.
- Install the new IC-rated LED fitting. The new fitting connects to the existing wiring, clips into the ceiling hole (usually the same size as the old fitting — 90mm is standard), and sits flush.
- Test and restore power. Each fitting is tested before we sign off. Dimmability, correct colour, no flicker.
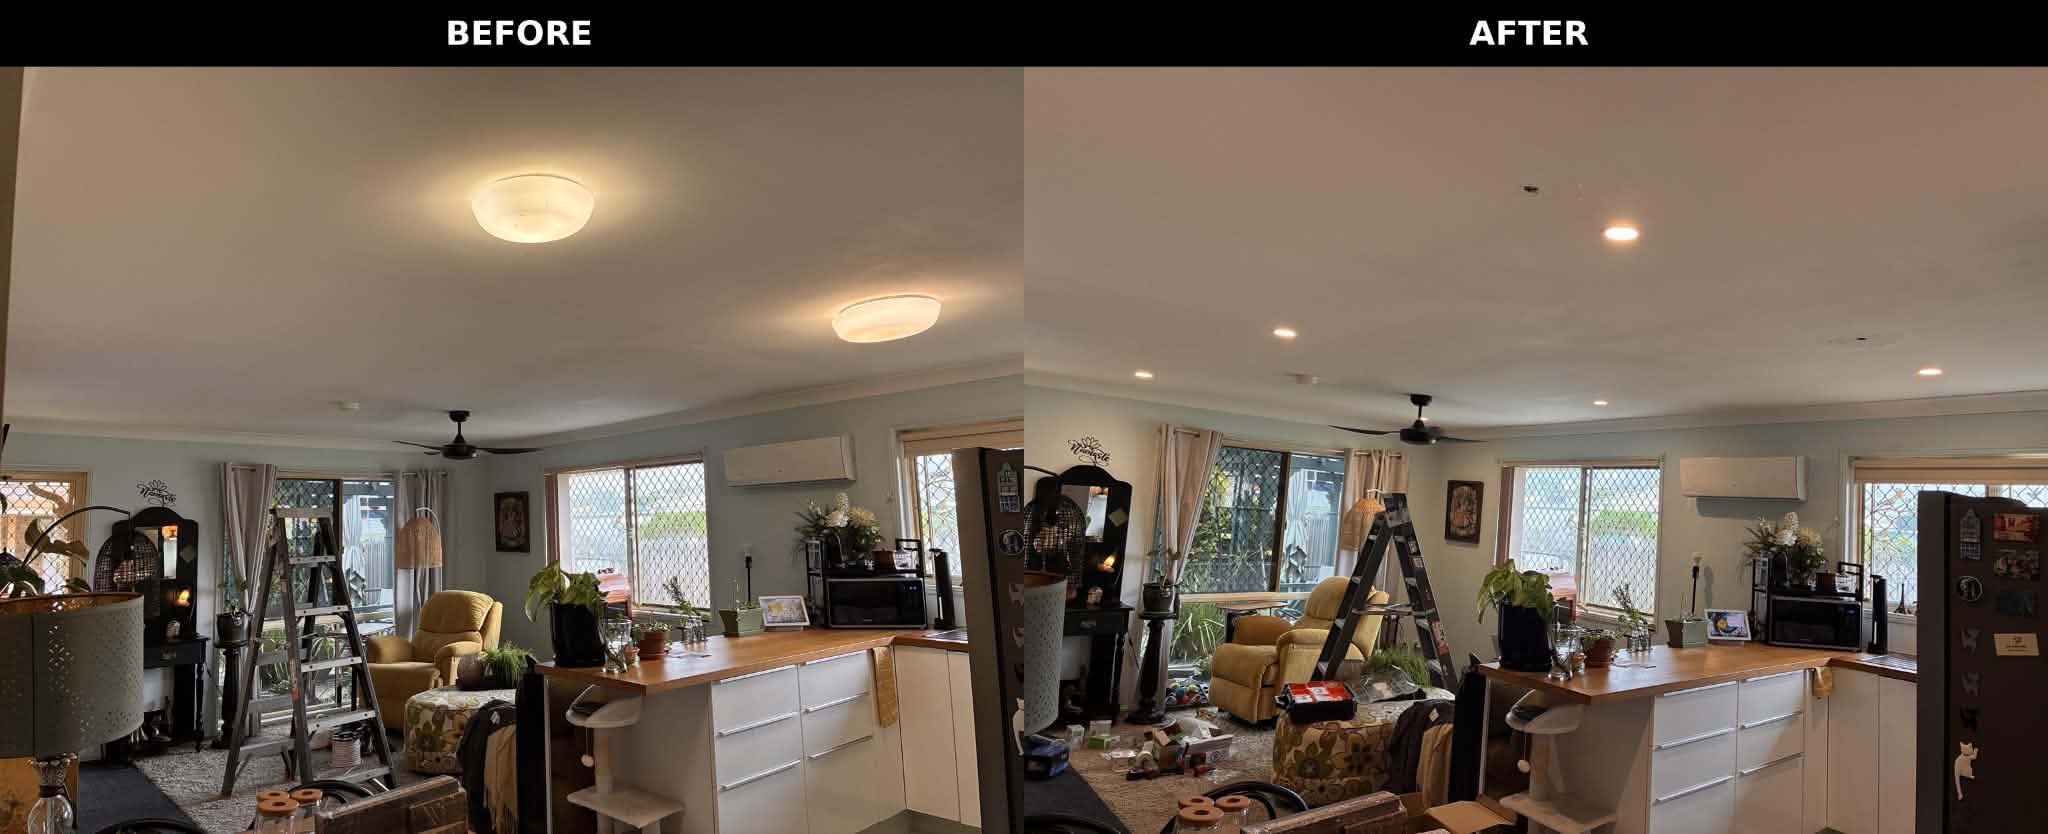
Most homes we work on in Caloundra and Buderim have 8–20 downlights. A full house replacement typically takes half a day and the difference in the rooms is immediately noticeable — cleaner, brighter, more even light distribution.
Why This Is a Licensed Electrician's Job
Swapping a halogen globe for an LED globe in the same fitting is a homeowner task — it's just a globe, same base, no wiring involved. Replacing the fitting itself is not.
Once you're disconnecting wiring — even low-voltage wiring in the ceiling — you're doing electrical work under the Electrical Safety Act 2002 (QLD). That work must be done by a licensed electrical contractor. An unlicensed person doing this work is not covered by insurance, cannot get a certificate of compliance, and is personally liable if something goes wrong.
More practically: if you have a house fire and an investigation finds unlicensed electrical work was done, your insurer may deny your claim entirely. The licensing requirement exists for good reasons.
Halogen Downlight Fires on the Sunshine Coast
This isn't a theoretical risk on the Sunshine Coast. Older homes in Caloundra, Buderim, Maroochydore and surrounding areas were built through the 1990s and 2000s — right in the peak halogen installation era. Many of those homes also had insulation retrofitted as part of various government programs, which means insulation was added to homes that already had non-IC-rated halogen fittings in the ceiling.
Halogen downlight replacement is one of the most common jobs we do in this area, and it's genuinely satisfying work — every fitting we upgrade removes a real fire risk from a family home. We regularly find evidence of heat discolouration around old fittings when we open up the ceiling: charred timber, melted insulation nearby. The homeowners usually had no idea.
If your home still has halogen downlights and you haven't had them assessed, it's worth a call. We do same-day quotes across the Sunshine Coast and can usually give you an accurate price over the phone based on the number of fittings and ceiling type.